A Quick Start to OpenLink? Data Spaces (ODS)
ODS is included as part of Virtuoso Open Source (VOS) version 6.0 and higher. This page provides instructions on installation of the ODS suite of Data Space applications.
Please note that ODS is automatically installed in the Virtuoso Demo Database. Thus, you do not need to perform the installation steps below if working with a Virtuoso 6.0 (or higher) demonstration database.
- Configuring ODS
- Locate and install the VAD packages
- DNS Settings
- Configure ODS
- Configuring the ODS domain(s)
- Configuring ODS instance as an X.509 Certificate Authority and HTTPS listener
- Configuring ODS Dataspace Objects
- Configuring PSH in ODS Dataspace
- Customization
- Adding users with Conductor
- Configuring the Virtuoso mail handler on UNIX
- Other SMTP Servers
- ODS Tutorials
- Reference Guides
- Related
- Additional Information
Configuring ODS
Configuration Parameters
ODS depends on certain parameters in the Virtuoso Database Initialization File (INI file, e.g., demo.ini for the demonstration database).
The default settings in this file are appropriate for most installations.
However, before starting the Virtuoso server for ODS use, you should verify that the following parameters are set in the INI file:
- HTTP Server must be enabled (
HTTPServersection), e.g. --
;Virtuoso ini
...
[HTTPServer]
ServerPort                  = 8890
...
- A default mail server must be specified in
DefaultMailServer HTTPServersection. This must point to a valid SMTP server for outgoing mail, e.g. --
;Virtuoso ini
...
[HTTPServer]
DefaultMailServer           = smtp-submit.example.com:587
...
- The URIQA section must have a proper '
DefaultHost
;Virtuoso ini
...
[URIQA]
DefaultHost = demo.mydomain.com:1112
...
- The
ImageMagick, Wikiv, CreoleWiki, MediaWiki plugins are enabled via the following entries in the "[Plugins]" section, for ex:
;Virtuoso ini
...

[Plugins]
... other plugins..
LoadPath = /usr/local/lib
Load1    = plain,im
Load2    = plain,wikiv
Load3    = plain,mediawiki
Load5    = plain,creolewiki
... other plugins ...
Locate and install the VAD packages
VAD Packages
Once you have verified the server settings, the next step is to install the VAD packages.
For binary distributions and the tree made by make install, they are located in the share/virtuoso/vad directory under the installation root. If you are using the demo database, the packages are pre-installed.
The ODS VAD packages for this release include:
- OpenLink Data Space (ODS) Framework (ods_framework_dav.vad)
- ODS-WebBlog (ods_blog_dav.vad)
- ODS-Briefcase (ods_briefcase_dav.vad)
- ODS-Feed Manager (ods_feedmanager_dav.vad)
- ODS-Wiki (ods_wiki_dav.vad)
- ODS-Mail (ods_webmail_dav.vad)
- ODS-Bookmark Manager (ods_bookmark_dav.vad)
- ODS-Gallery (https://shop.openlinksw.com/license_generator/vad/?)
- ODS-Community (ods_community_dav.vad)
- ODS-Polls (ods_polls_dav.vad)
- ODS-Addressbook (ods_addressbook_dav.vad)
- ODS-Discussions (ods_discussion_dav.vad)
VAD Installation
The next step is to install the VAD packages:
- With ISQL, run the following command:
SQL> VAD_INSTALL('<path of the VAD file>',0);
- Install the files in the order of the above listing. The web pages of the packages will go into the server's WebDAV? repository.
DNS Settings
If you wish to offer virtual host names for applications, as in myblog.example.com, then the DNS has to be set up to direct *.example.com to the host where Virtuoso is running. If users will not choose Virtual Host names for their applications, this step can be skipped.
Configure ODS
The larger part of configuration is performed through the browser:
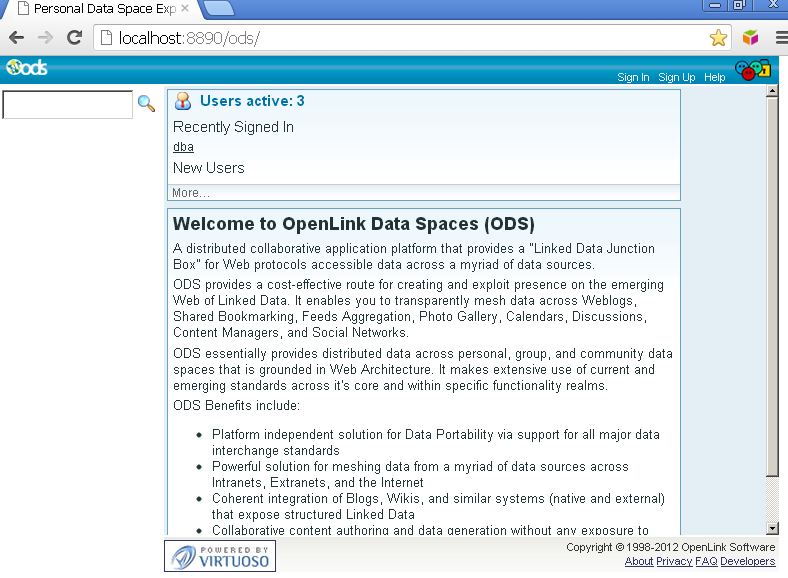
- Enter the URL http://[host]:[port]/ods where the host and port are the server and port your Virtuoso instance is running on.
(e.g.
http://localhost:8890/ods/) :
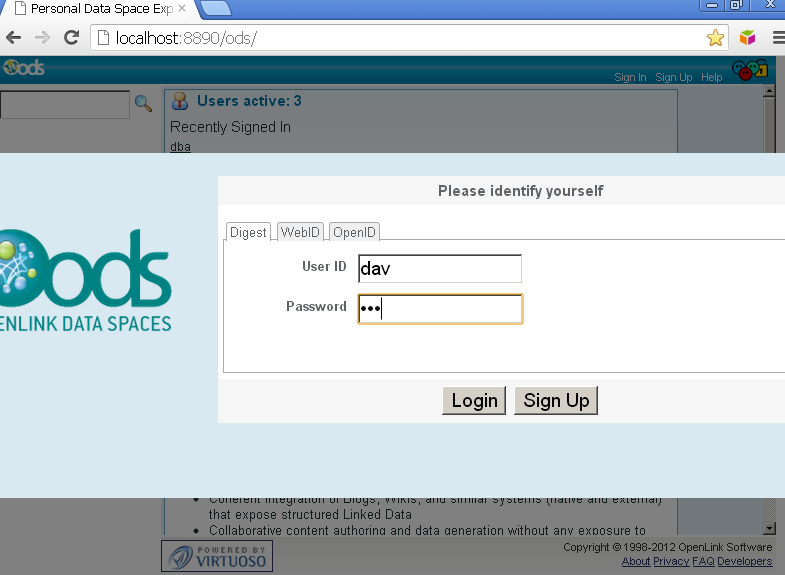
- Login as "dav", the default password is "dav".
- Click on "Site Settings":
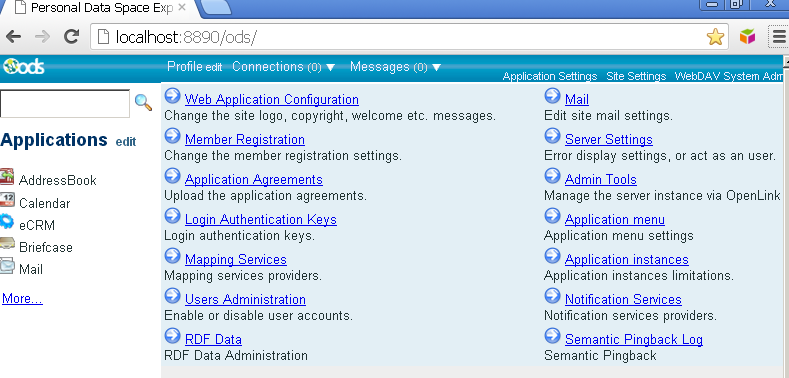
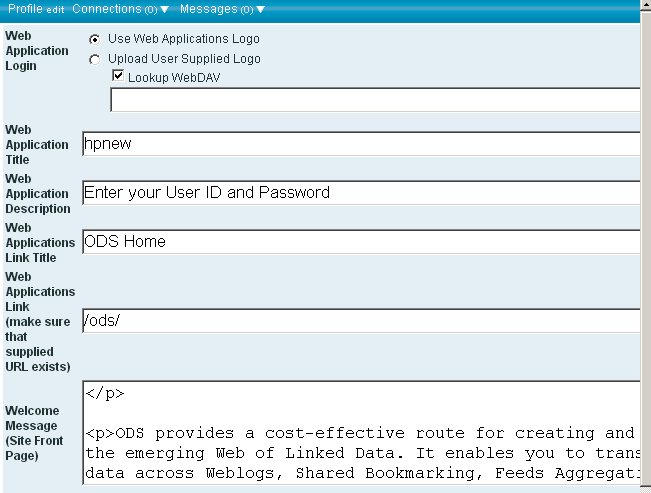
- Open the "Web Application Configuration" page and enter a Google API key.
You can obtain a key by from http://www.google.com/apis/maps/signup.html, and choosing the appropriate Geocoder service.
Note that not all Geocoder services return addresses for non-US countries:
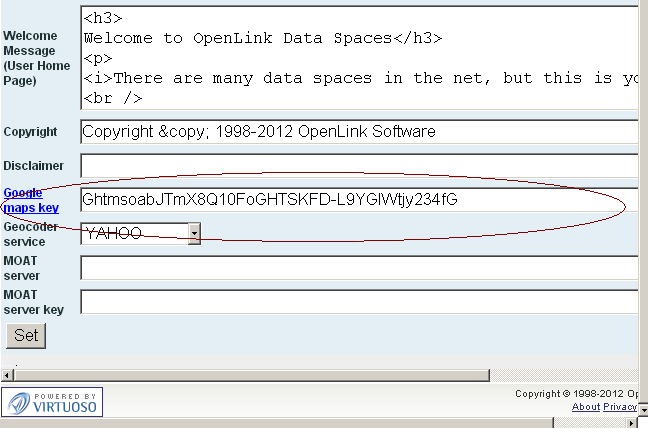
- Save the changes and return to the "Site Settings" via the link at the top.
You can skip these steps but then the map-related features will be disabled.
- Click on "Site Settings" -> "Mail" settings page:
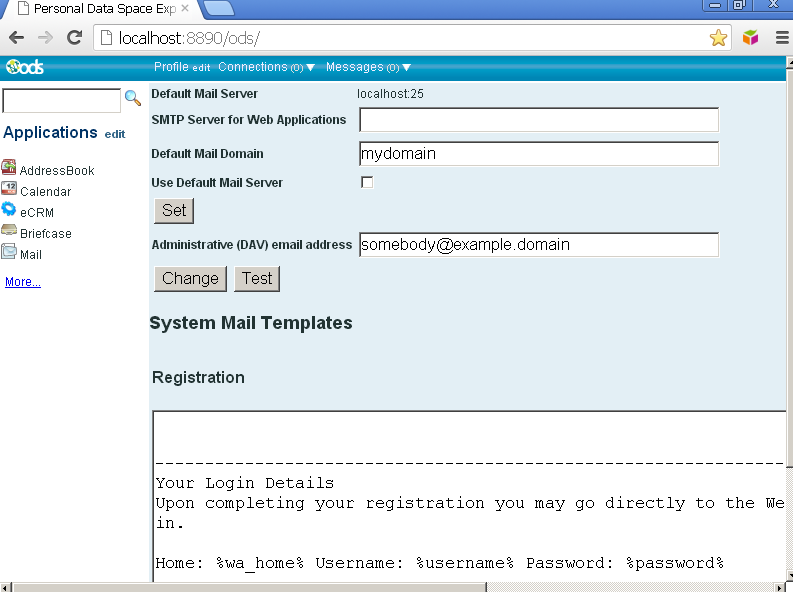
- Specify the proper default mail domain, whether to use the default mail server (from the INI) or enter another:
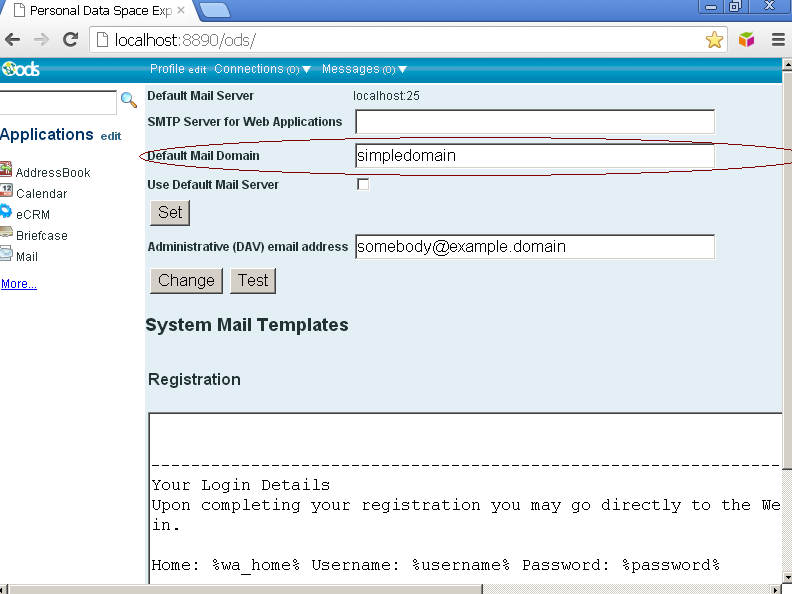
- Specify the proper ODS admin mail address and save the settings:
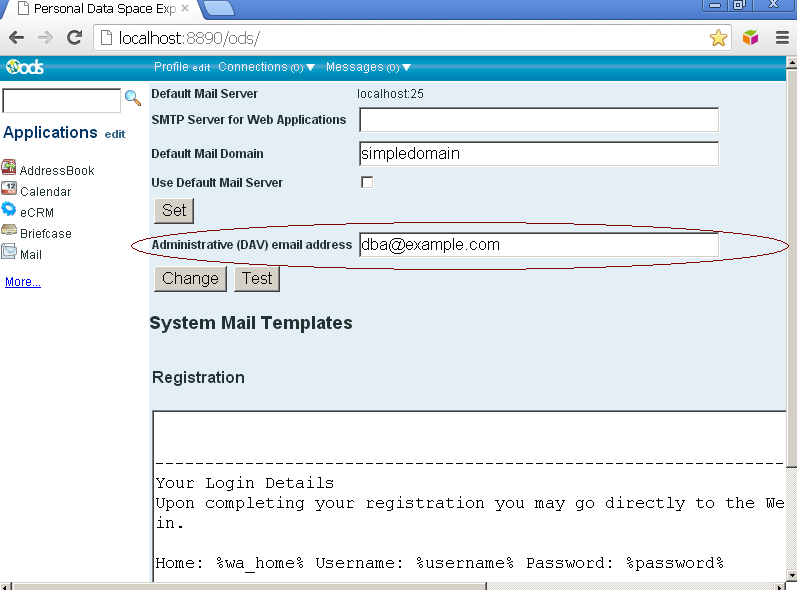
- Press the "Test" button to verify that the mail settings actually work and click "Update.
- Return to the "Site Settings" page.
- Click on the "Member Registration" settings page:
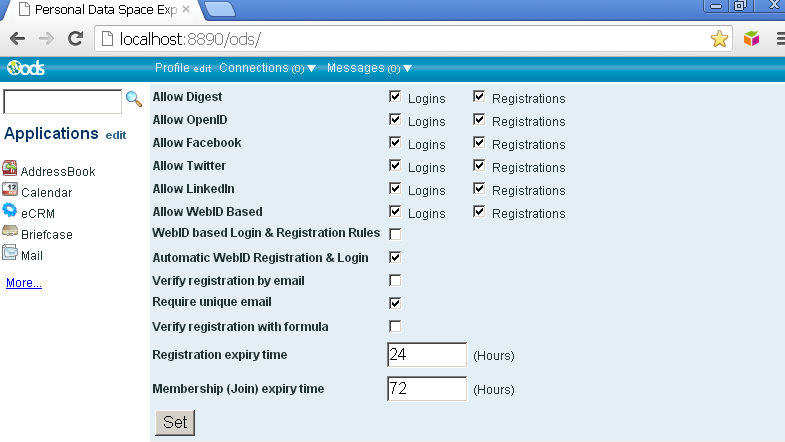
- Select the desired registration scheme from the options, or if you are not sure what to use, just leave as it is.
Here are the options that change the behavior of the ODS site registration:
- "Allow Digest: Logins/Registrations" - allow regular users logins and registrations;
- "Allow OpenID?: Logins/Registrations" - allow OpenID? user logins and registrations;
- "Allow Facebook: Logins/Registrations" - allow Facebook user logins and registrations;
- "Allow Twitter: Logins/Registrations"; - allow Twitter user logins and registrations;
- "Allow LinkedIn?: Logins/Registrations"; - allow LinkedIn? user logins and registrations;
- "Allow WebID? Based: Logins/Registrations"; - allow WebID? based user logins and registrations;
- "WebID? based Login & Registration Rules"; - allow WebID? based Login & Registration Rules;
- "Automatic WebID? Registration & Login"; - allow Automatic WebID? Registration & Login;
- "Verify registration by email" - whether to send a mail to the new users with confirmation or create the account immediately.
- "Require unique email" - if not checked a single mail can be used multiple times for registering new users.
- "Verify registration with formula" - formula is presented so the registration to be verified.
- "Registration expiry time" - time in hours after which registration confirmation is not possible.
- "Membership (Join) expiry time" - time in hours for which membership invitation is valid.
ODS is now ready for use.
Note: if you disable the default site registration, then in addition to the above the ODS admin will need to create user accounts for the site members.
Configuring the ODS domain(s)
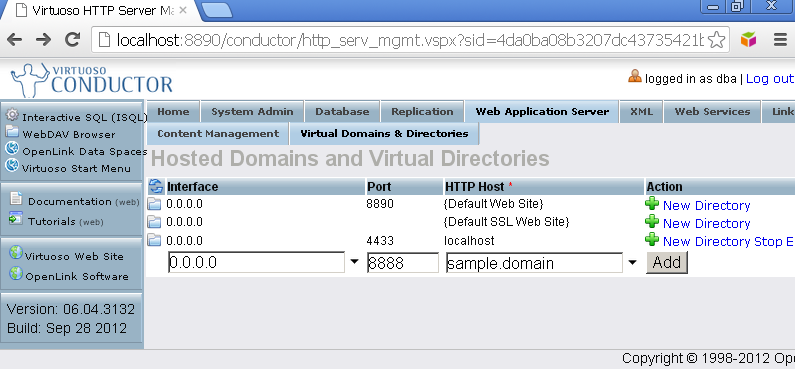
In order to allow ODS users to create their own sub-domains (e.g. user.sample.domain, where ODS domain is sample.domain) the ODS should be configured via Conductor UI.
The following describes how to enable an ODS domain :
- Go to http://host:port/conductor
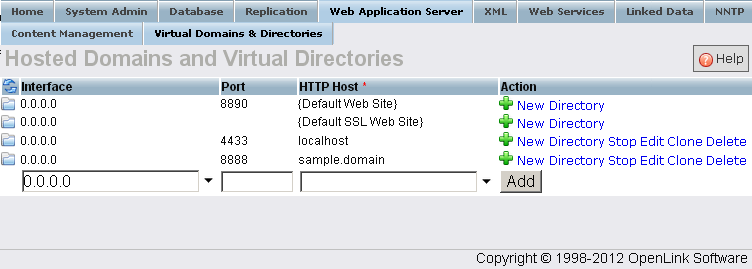
- Login as 'dba' and open "Web Application Server" -> "Virtual Domains & Directories"
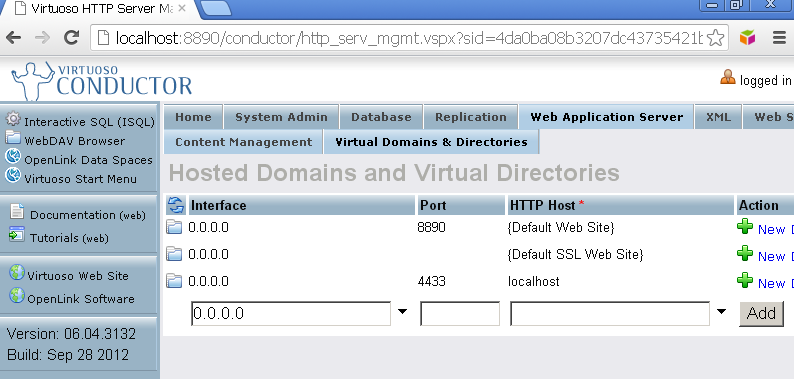
- Specify the interface address, port to listen and domain like '0.0.0.0' (all interfaces), 8888 and 'sample.domain' in the form below the list and click 'Add':
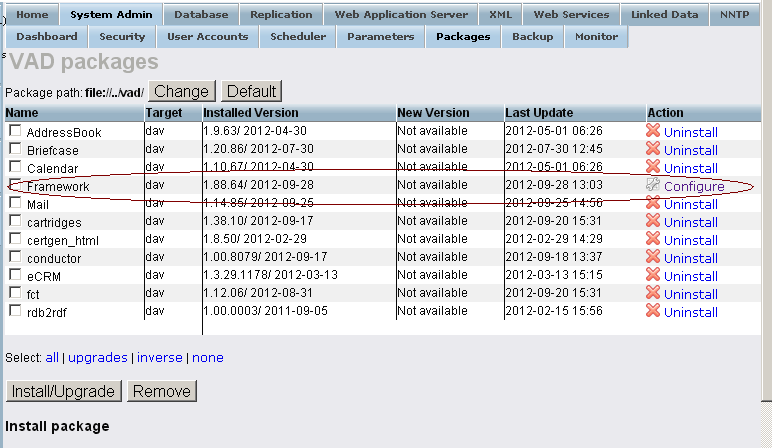
- Open "System Admin" then "Packages", open the Configure page for "Framework" package:
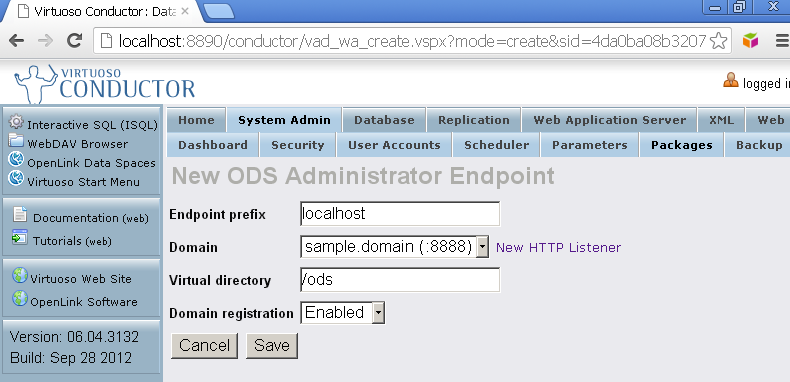
- Select "Create New Endpoint" link; the new ODS endpoint form should be shown:
- You can specify either "Endpoint prefix" or "Virtual directory" or both to enable the domain from selection list to be used as ODS domain.
- Leave the "Domain registration" option enabled
- Confirm the changes; the new ODS endpoint will be listed.
After performing the above steps, when creating a new application instance, the new domain will be selectable when choosing a virtual host name for the application.
Configuring ODS instance as an X.509 Certificate Authority and HTTPS listener
See our Certificate Authority and Issuer Setup Guide.
Configuring ODS Dataspace Objects WebID? Access Control Lists (ACLs)
Configuring PSH in ODS Dataspace
PubSubHub? (PSH) setup consists of two steps:
- Set up the ODS server.
- Configure applications to publish to hub.
See detailed steps here.
Customization
- ODS pages
The ODS pages can be modified by editing the .vspx and.css files in <Virtuoso OpenSource?>/appsrc/ODS-Framework/ and then re-build the ods_framework_dav.vad and re-install it. Alternately, you can install the ods_framework_filesystem.vad package which will put the dynamic web pages in the filesystem and you can edit them as the server is running, as you would edit any dynamic web pages under PHP or similar.
- User's home
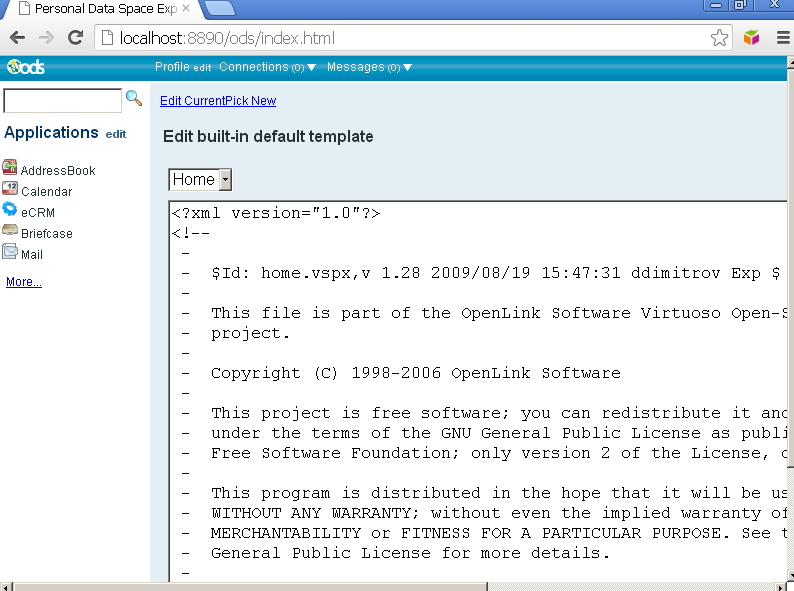
The users in ODS may wish to change the look and feel of their own home pages in the ODS. To do so, the user should go to 'Application Settings' -> 'Home Page Template Selection' settings page. In the presented text area he/she can edit the home page without any special permissions by ODS administrator.
Note: The current ODS version of the ODS contains one 'default' home page template, which can serve as a basis for customization.
Adding users with Conductor
IMPORTANT: Below are instructions for adding new user accounts if registrations are disabled.
This can be performed in the Conductor (pre-installed on the Demo Database):
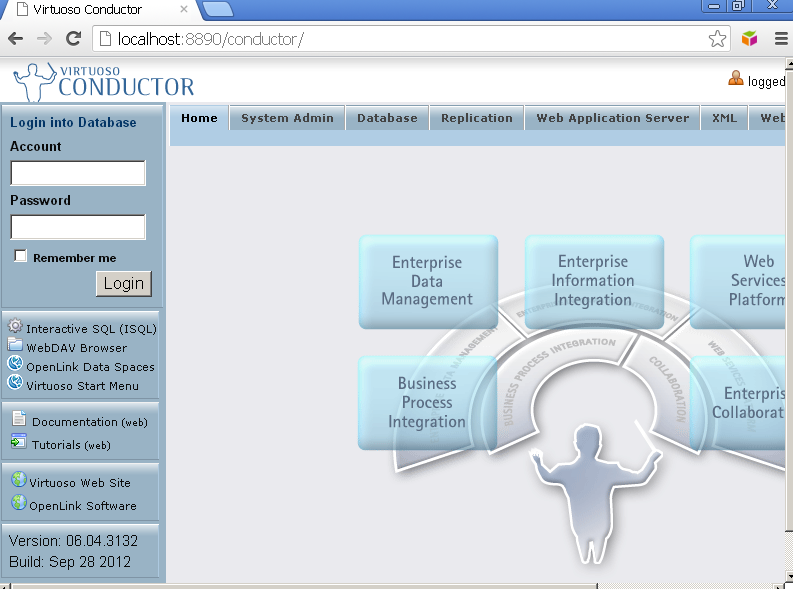
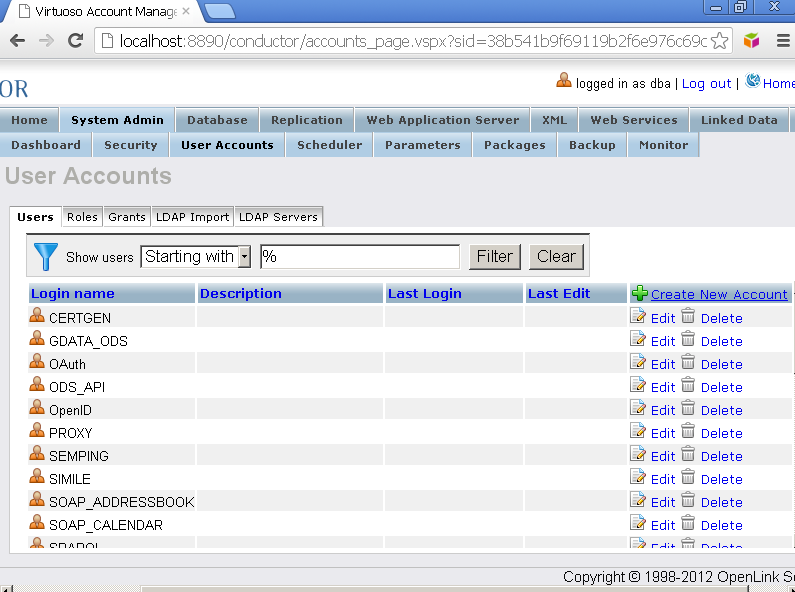
- Open Conductor via browser at http://host:port/conductor (e.g. http://localhost:8890/conductor/)
- Login as 'dba'
- Go to "System Admin" and the "User Accounts" tab:
- Open the "Create New Account" page:
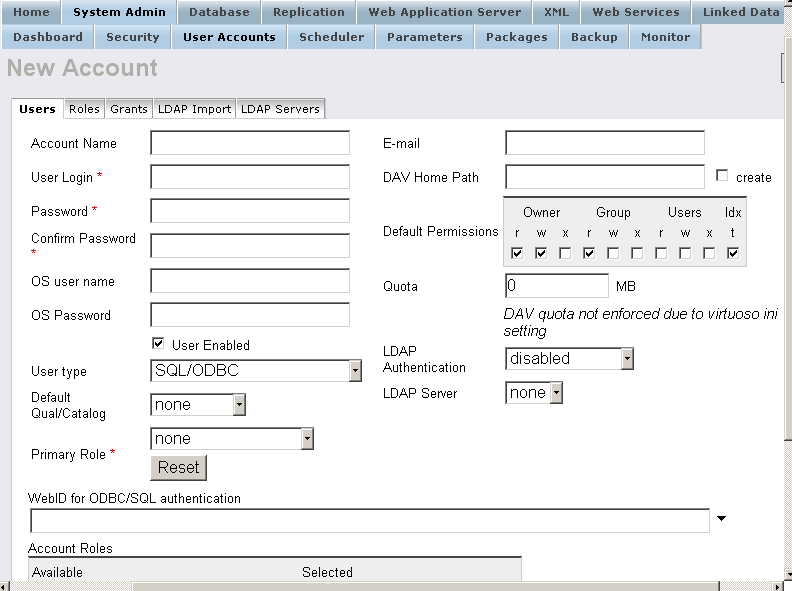
- Enter the requested information and specify User type as "WebDAV?":
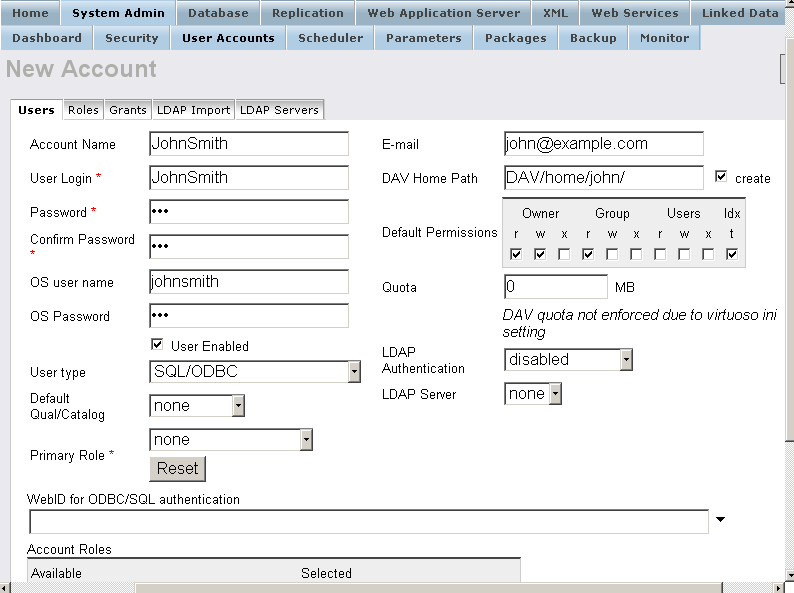
- Click "Save" to finish the user creation.
Configuring the Virtuoso mail handler on UNIX
Virtuoso provides a local mail delivery program (virt_mail) for SMTP servers. This program is used to store the received mail into the Virtuoso database.
The following instructions are applicable to UNIX systems using sendmail as a mail server.
Note: for more detailed information view a detailed guide for settings VOS SMTP Mail handler on Win32 platforms.
Virtuoso Mail Handler Configuration
- Copy virt_mail to /usr/bin/virt_mail
- Copy
/binsrc/maildrop/odbc_mail.default.ini to /etc/odbc_mail.ini - Edit /etc/odbc_mail.ini and change the login settings to match your current database installation:
[Options]
DSN = DSN=Virtuoso; HOST=localhost:1111;UID=dba;PWD=dba
;MaxMessageSize = 2097152
Verify = DB.DBA.WA_MAIL_VALIDATE ('$local')
Deliver = DB.DBA.WA_NEW_MAIL('$1', $message)
(You can probably leave the rest of the odbc_mail.ini alone.)
Note that DSN contains reference to the VOS server SQL port, so this should be replaced if non-default SQL port (1111) is used.
Sendmail program configuration
Replace the default local mailer in your sendmail.cf
...
#Mlocal,        P=/usr/bin/procmail, F=lsDFMAw5:/|@qSPfhn9, S=EnvFromL/HdrFromL, R=EnvToL/HdrToL,
#               T=DNS/RFC822/X-Unix,
#               A=procmail -t -Y -a $h -d $u
Mlocal,         P=/usr/bin/virt_mail, F=lsDFMA5:/|@qSPhn9, S=10/30, R=20/40,
                T=DNS/RFC822/X-Unix,
                A=virt_mail -c /etc/odbc_mail.ini -l $u -h $h -s $g
...
IMPORTANT: make sure that ODS packages are installed prior to making the changes above.
Verify Mail Settings
Send an e-mail to the 'dav' user account:
bash$ mail dav@<domain>
Subject: virt-mail-test
.
Cc:
Using the ISQL tool check the mailbox of the 'dav' user account:
SQL> select mm_subj from mail_message where mm_own = 'dav';
MM_SUBJ
VARCHAR
_______________________________________________________________________________

virt-mail-test
If you see the subject of the mail which was sent in previous step, then the handler works correctly. Otherwise you should check the log of the sendmail program.
Other SMTP Servers
For the other mail server programs please consult INSTALL document in the <Virtuoso Open Source>/binsrc/maildrop/ directory.
Setting the VOS SMTP Mail handler on Win32 platforms
Before to start you make sure that STMP services for Internet Information Services (IIS) are installed on your Windows box.
To check that open Control Panel, Add or Remove Programs, Add/Remove Windows Components. In the "Internet Information Services" see Details there you must have "SMTP Service" installed, if not check and proceed with Windows installation update. Please note that Windows installation disk may be asked.
Note: for more detailed information view a detailed guide for settings VOS SMTP Mail handler on Win32 platforms.
If SMTP Service is installed then proceed with following steps:
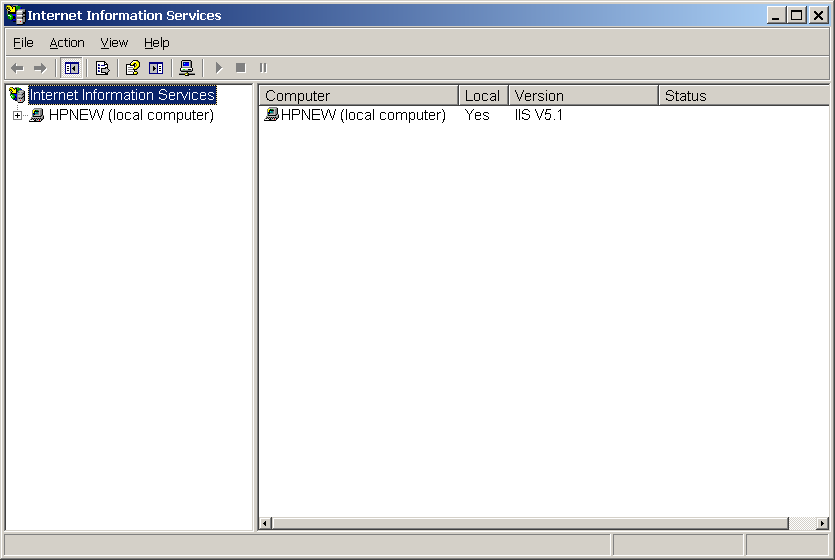
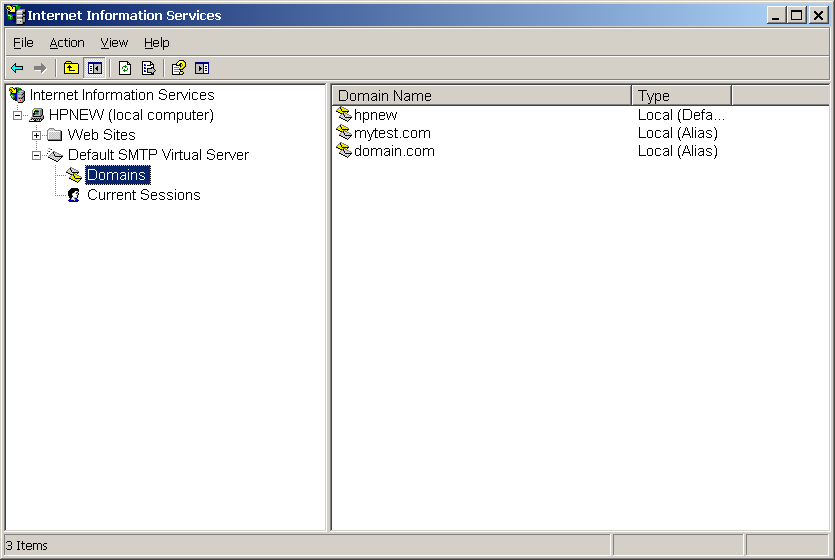
- Open IIS configuration via Control Panel -> Administrative Tools -> Internet Information Services:
- Check the default SMTP Virtual server is running , and if needed add alias or domain.
Note the domain name, this will be used in the next steps:
- Open a command prompt (CMD)
- Go to the VOS binary distribution (c:\vos for example), in the c:\vos\bin directory
- Make sure register.bat, smtpreg.vbs and odbc_mail.ini are in place, if not download the ZIP (attached) and unpack in this directory
- Run
register.bat /register "domain-name"
where the domain-name is domain that you wish to be served for the purpose (the one from second step) - If no error, you should see message like:
   assigning priority (0 of 32767)
   registered OpenLink MailDrop
   set priority Command to c:\vos\bin\odbc_mail.exe
- Edit the c:\vos\bin\virt_mail.ini and edit HOST address and port to match your Virtuoso OpenSource? server in following line:
DSN = DSN=Virtuoso; HOST=localhost:1112;UID=dba;PWD=dba
- Make sure Virtuoso OpenSource? server is running and test the SMTP handler installation as follows:
- Connect with ISQL tool to the VOS database and execute following commands:
SQL> smtp_send ('localhost:25', 'dba@testdomain', 'dba@testdomain', 'Subject: test\r\n\r\ntest');

Done. -- 26 msec.
SQL> select MM_SUBJ from mail_message;
MM_SUBJ
VARCHAR
_______________________________________________________________________________

test

1 Rows. -- 0 msec.
SQL>
- You should see a row with text "test" in the result. Please note that "testdomain" should be replaced by your domain (see above).
- If something is broken, you can turn on logging in virt-mail.ini with uncommenting MailDebug? setting
- If all is ok, then change the Verify and Deliver options in odbc_mail.ini to:
Verify = DB.DBA.WA_MAIL_VALIDATE ('$local')
Deliver = DB.DBA.WA_NEW_MAIL('$1', $message)
- Connect with ISQL tool to the VOS database and execute following commands:
- The STMP mail handler is ready for use with VOS ODS applications.
ODS Tutorials
- ODS-Profile Manger Usage Guide
- ODS SIOC Query Tutorial
- ODS Ubiquity Commands Tutorials
- OAuth Ubiquity Tutorial
- SPARQL OAuth Tutorial
- WebID Protocol & SPARQL Endpoint ACLs Tutorial
- Register ODS User with OpenID2 Tutorial
- SWATO Tutorial
Reference Guides
- SPARQL Tutorials Part 1: Using SIOC to Model the Linked Data Web
- SPARQL Tutorials Part 2: SPARQL Extensions in the Virtuoso Universal Server
- SPARQL Tutorials Part 3: SPARQL and Analytics
- SPARQL Tutorials Part 4: Exploring FOAF-, Atom OWL-, Annotea-, and SKOS-based Data Spaces on the Linked Data Web
- ODS Programmers' Guide
- ODS SIOC Reference
- Virtuoso OAuth Programmers' Guide.
Related
- OpenLink Data Spaces
- Virtuoso ODS-Mail Installation Guide
- General Intranet Quick Start Guides by functionality realm
- CA Keys Import using Conductor
- Generate an X.509 Certificate hosted WebID Guide
- Generate an X.509 Certificate (with a WebID watermark) to be managed by host operating system keystore
- Generate an X.509 Certificate (with a WebID watermark) to be managed by a browser-based keystore
- Using Virtuoso's WebID Verification Proxy Service with a WebID-bearing X.509 certificate
- Using Virtuoso's WebID Identity Provider (IdP) Proxy Service with an X.509 certificate
- PubSubHubBub Demo Client Example
- Feed subscription via PubSubHub protocol Example
- Setting Up PubSubHub to use WebID Protocol or IP based control lists