
Javascript pages modification notes
The Javascript pages can be tested/used both in case they are located in OS file system / or DAV.
By default with the ODS Framework package installation is created virtual folder /ods/webid which is mapped to the created created by default OS file system type folder vsp\vad\vsp\wa\webid.
Scenario 1
In case you want to add your own Javascript page, you need to add it to the existing OS file system type foldervsp\vad\vsp\wa\webid / or to any DAV location.
If you choose a DAV location, make sure you create a new virtual folder that is mapped to this DAV location.
For ex.:- Suppose your new Javascript page is named mytest.html and you have placed it in DAV location
/DAV/home/demo:
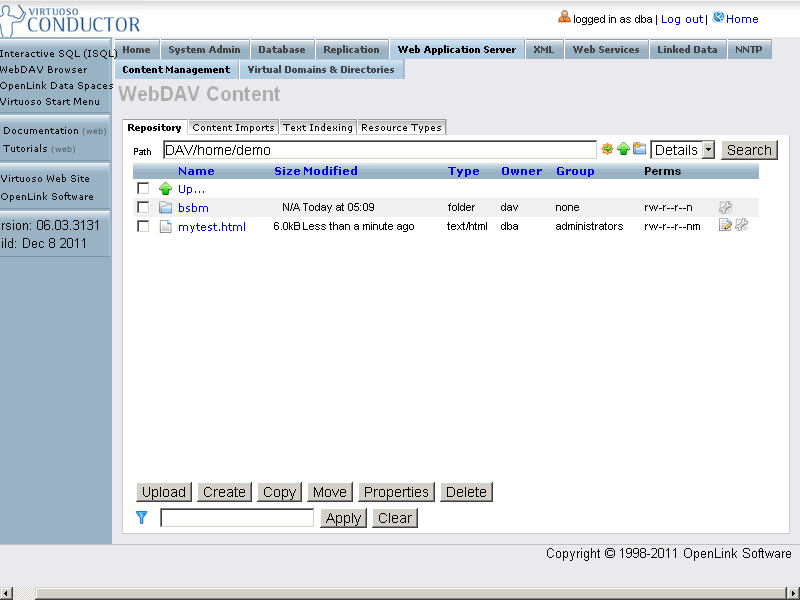
- To create a virtual folder for ex.
mytest, go to Conductor -> Web Application Server -> Virtual Domains & Directories and expand the UI for your lets say Default Web Site:
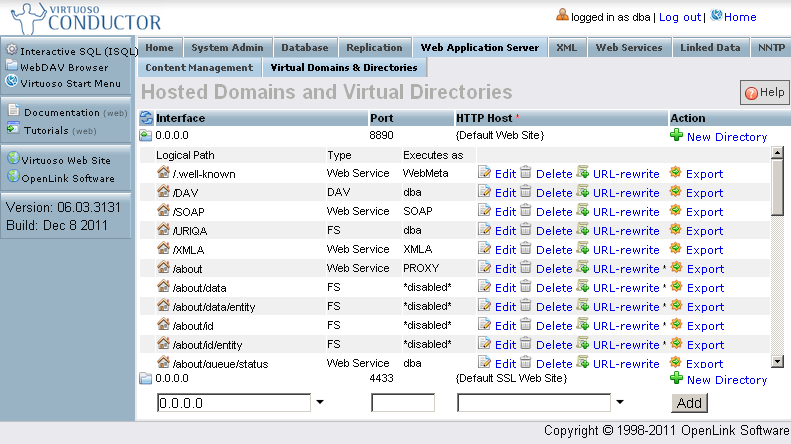
- Click "New Directory"

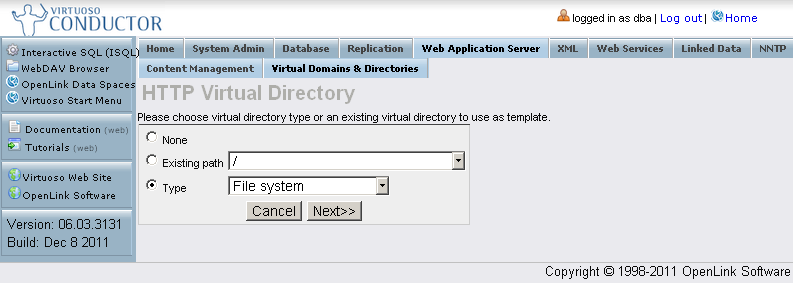
- Specify type: "WebDAV domain":

- Click "Next"
- In the presented form specify:
- Path: /mytest
- Check-box "Physical path is a WebDAV repository" should be hatched.
- Physical path: /DAV/home/demo/
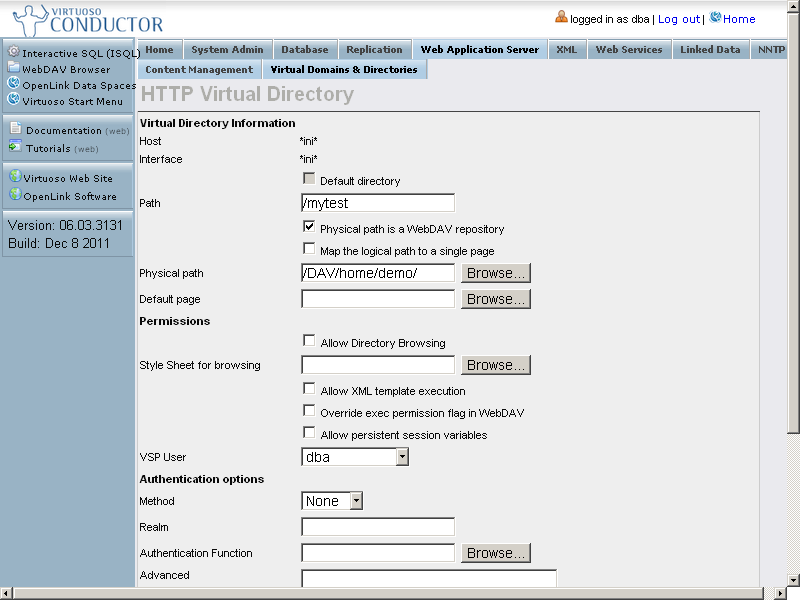
- Click "Save Changes".
- Access your Javascript page with the new created path: http://host:port/mytest/mytest.html
- After choosing a valid certificate, your modified Javascript page should be presented:

Scenario 2
In case you want to use another path for accessing your Javascript page, different from the default virtual folder /ods/webid, you need to create a new virtual folder which is mapped to the OS file system type folder vsp\vad\vsp\wa\webid.
- Suppose the Javascript page webid_demo.html is located at your OS file system
/vsp/vad/vsp/wafolder. - To create a new virtual folder, for ex.
fstestgo to Conductor -> Web Application Server -> Virtual Domains & Directories and expand the UI for your lets say Default Web Site:
- Click "New Directory"
- Specify type: "File system":
- Click "Next"
- In the presented form specify:
- Path: /fstest
- Check-box "Physical path is a WebDAV repository" should be un-hatched.
- Physical path: /vad/vsp/wa/webid
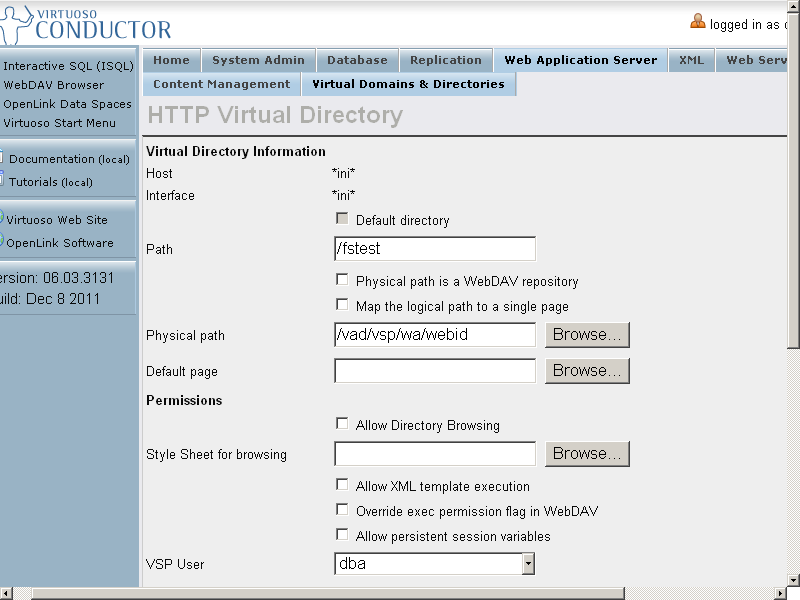
- Click "Save Changes".
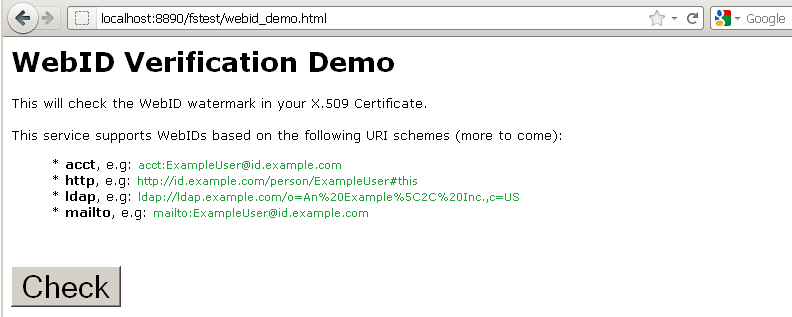
- Access the Javascript page with the new created path: http://host:port/fstest/webid_demo.html
- After choosing a valid certificate, the Javascript page should be presented:
Related
- Using Virtuoso's WebID Verification Proxy Service with a WebID-bearing X.509 certificate
- Using Virtuoso's WebID Verify Proxy Service with an X.509 certificate WebID: JavaScript Example