ODS Community Getting Started
Prerequisites
- Virtuoso Server has been installed and is running.
- ODS and other ODS Applications including Community have been successfully installed.
- Registration of a new ODS account or login as DBA or DAV account.
- For a registered account created ODS Application instances.
Login to ODS and Create your Community
- Using a web browser, login into you ODS user account or login as DAV or DBA by typing the following URL into your web browser:
example: http://localhost:8890/ods/ - Select the Community tab from the ODS Bar.
- Select the "Create New" Link.
- Enter your community name, community URL and click the button labeled "Create and Launch Application", which will create a new Community instance.
Configure your Community Applications List
Once you have created an instance you should configure your community applications settings.
- Select the "Settings" link on the main navigation tool bar.
- Click the "Applications" link in the left pane menu.
- Select applications from the "Owned applications list" and click the ">>" button in order to add them to your Community.
- Filter the applications list by choosing a scope "Starting with", "Containing", "Ending with", "Exact Match". After you have selected applications shown in the "Owned Applications" list and added them to the "Community application list", click Save.
Invite Members
ODS Community supports the ability to be added members in several ways:
- Under Settings click the "Membership and Visibility Settings" link in the left pane menu.
- Click the "Home" tab of the Community Navigation bar. From the left pane menu click New Members-> More.
- Click the "Invite" tab of the Community Navigation bar.
View Community Application Dashboards
Once you have customized your community, now you are ready to view the applications dashboards.
- From the Community Navigation bar select the "Weblog" or the "Feeds" tab. As result will be shown the posts "Subject", "Creator" and "Date" of posting values.
- From the Community Navigation bar select the "Wiki" tab. As result will be shown the articles "Instance", "Topic" and "Opened" date values.
- From the Community Navigation bar select the "Community" tab. As result will be shown the Community instances with "Name", "Creator" and "Date" values.
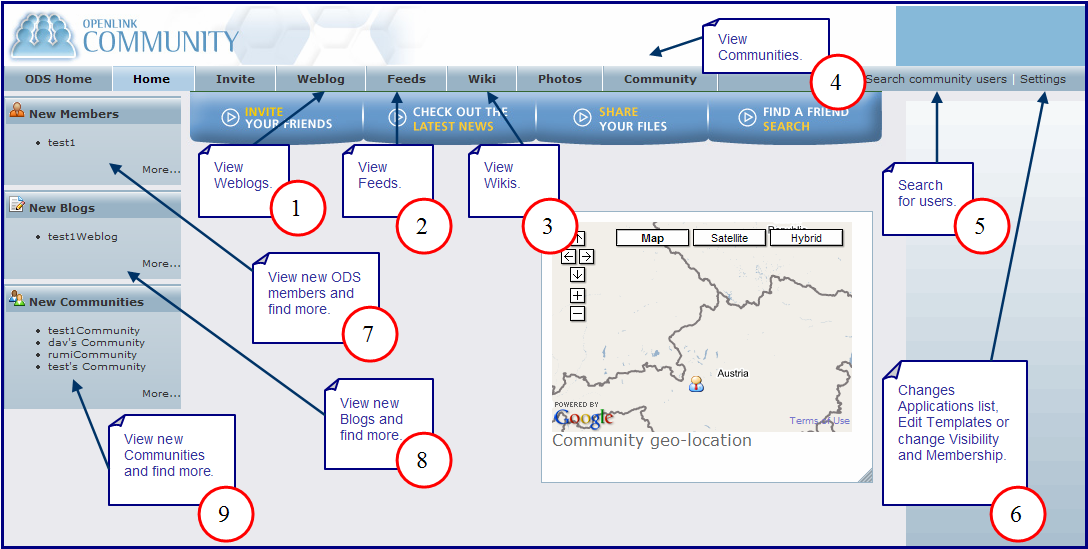
Community Interface Overview
Now that you have configured your first Community, you can view some of Communitiy other features as shown below:
- View your Weblogs. Select the Weblog tab from the Community Navigation bar.
- View your Feeds. Select the Feeds tab from the Community Navigation bar.
- View your Wikis. Select the Wiki tab from the Community Navigation bar.
- View all Communities. Select the Community tab from the Community Navigation bar.
- Search for community users.
- Change Community Application list or Edit Templates. Select Settings from the Community Navigation bar.
- View new members and find more from the left pane "New Members" at the Home tab page.
- View new Blogs and find more from the left pane "New Blogs" at the Home tab page.
- View new Communities and find more from the left pane "New Communities" at the Home tab page.
Figure 1 - Community
CategoryODS CategoryCommunity CategoryGettingStarted CategoryOpenSource